Welcome to
This is the first in a year long series of monthly blog hops
focusing on techniques for card makers.
Each month we'll feature a different technique or fold or product.
We've assembled a team of card makers who range from new to advanced
so you'll get a great variety of cards and ideas.
This month we will be focusing on emboss resist techniques and WOW have we got
some cool cards for you today. We really love feedback so please leave a comment on each of the blogs in today's hop. Each comment on the 12 hops throughout the year will be entered into a prize drawing for a $25 gift certificate at the end of the year and for January anyone who hops and comments will be eligible to win an embossing package of 3 Wow brand embossing powders, clear, white and a surprise color and a Versa Mark Embossing Ink pad. Comments for January's giveaway must be posted by January 30th. Winner will be posted February 1st.
Before I get started with my cards, I thought I'd give you a little intro to emboss resist and heat embossing in general. You'll need the following supplies to create embossed images:
- A good heat gun/tool (you can get one at most craft stores and in the major outlets you can use a coupon on them).
- An embossing ink, I prefer Versa Mark or Ranger but there are several brands on the market OR you can use any colored pigment based ink as they take longer to dry thus giving you time to sprinkle on the embossing powder.
- Embossing powder(s), now here is where people differ, some think they need every color of the rainbow. I, on the other hand, think that a good quality clear (I prefer WOW brand), a white (I prefer Ranger Detail or Stampin' Up), a glittery (I prefer Stampin' Up Iridescent Ice), a gold and a silver (Ranger) are all you need. If you use pigment inks, you can use clear embossing powder on top to create the look of colored embossing powders and there are hundreds of uses for pigment ink, while the colored embossing powders won't get that kind of use.
- A powder tool/bag or a used dryer sheet. When using embossing powders you need to prep the cardstock prior to stamping so that oils and static are neutralized before you add your ink and embossing powders so that the powder doesn't stick to anything but the ink you've just applied.
- A fine detail DRY paint brush. This will help you to brush away any stray embossing powder that happens to stick to areas you don't want it to BEFORE you use your heat tool to melt the powder. Once you've melted it, it isn't moving!
- Something to create your images with: stamps, stencils, the eraser of a pencil, anything you can apply ink with or through.
Embossing powder lasts a long time and the excess can be funneled back into the jar or container and reused. Work over a piece of copy paper or a coffee filter to make clean up and returning the extra powder back to the jar easy.
One last tip, let your heat tool get good and hot, usually letting it heat up at least 20-30 seconds before bringing it to your project. The faster the powder melts the better. You don't want to overheat the powder. This will leave you with a mottled bubbly mess instead of the smooth glossy look you are going for.
Now on with the projects.
I used Ranger Distress Ink, WOW clear embossing powder and Versa Mark Ink on all the cards.
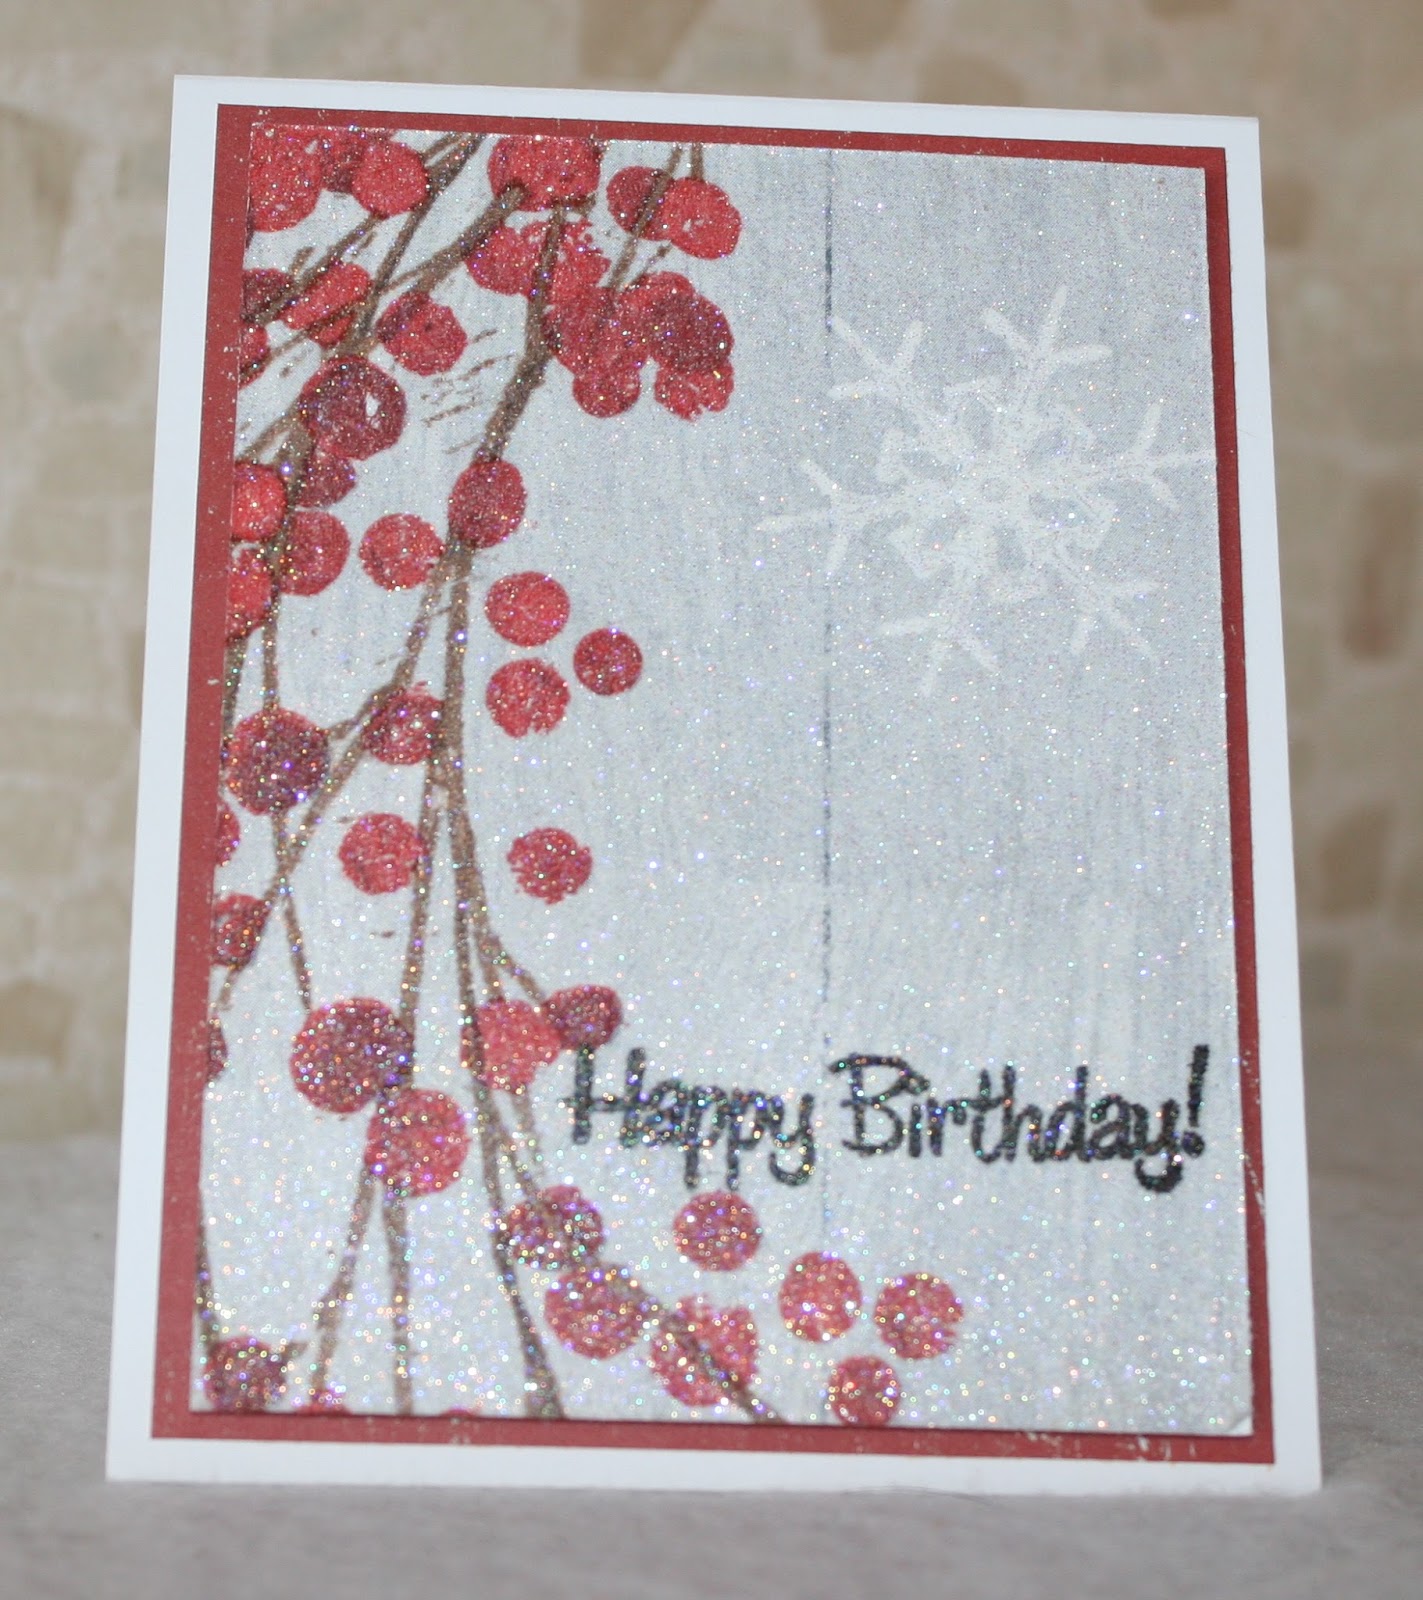
The first couple of cards I have for you today are just simple emboss resist cards.
For this first card, I used Picked Raspberry, Festive Berries and Mustard Seed Distress inks.
I added a little Heidi Swapp Glimmer Spray too.
For this second card, I stamped the birds in Versa Fine Onyx Black ink and
added the WOW clear embossing powder. I then colored them with Copic markers.
I then added Peacock Feathers, Mustard Seed and Twisted Citron.
Now for the rest of these cards I played with layering emboss resist, so all of the following cards are embossed twice. The first time on the plain white cardstock, then colored with the inks, then stamped again and more color added. You've got to try this! It was so much fun.
For this card, I stamped the words then embossed with clear powder. I then colored it using several pink shades of Ranger Distress Inks. I stamped on the circle background stamp and embossed with the clear powder again. I then added Ranger Walnut Stain Distress Ink to add the depth and shading.
For this next one, I stamped the script background stamp first then embossed with clear. I then colored the piece and stamped the flowers. I then used the smokey gray on top to add depth to the card.
For this next one, I stamped the flowers first, then colored then stamped the background script stamp then added a smokey gray on top.

What a difference it makes depending on which order you stamp!
The two cards above are the same stamps and inks but stamped and embossed in a different order. Two completely different looks, same supplies.
On this last card, I used White Embossing powder for second of the embossings.
I stamped and embossed the script stamp first then added color then stamped and embossed the circle stamp, using the white embossing powder.

I don't know about you, but I love how they turned out!
I know some of my pals are going to love receiving these.
Don't have Ranger Distress Inks? Don't fret. You can use any dye ink or try using glimmer mists or spray stains instead of ink over the embossing. Experiment and have fun.
Tell me which one(s) you like the best, I'd love to know.
Get out your embossing powder and have fun!
Kim's up next, you won't want to miss what she and Katy have for you.
Happy Crafting
Theresa
Don't forget to comment on all the blogs in the hop each month to be entered into the drawing.
Here's today's line-up in case you get lost along the way